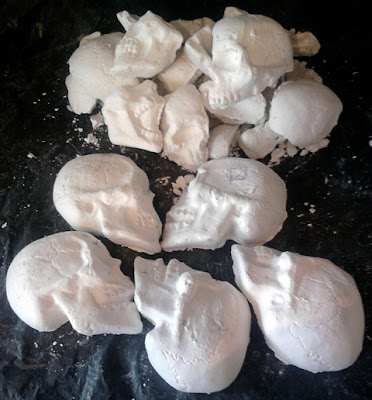
Work on the unfinished Troll Screamers shown above as well as several NEW Troll Screamers will resume soon. I have several body parts ready to go for the new creations.

Thursday, 10 February 2011

SALVAGING USED PLASTER

On reflection this is something i really should have mentioned way back when i first posted about making plaster molds (how to plaster cast a dolphin) that's got to be over 200 posts ago now - Sorry folks. Basically when using plaster when the project goes wrong, breaks when de-molding etc you need not throw away your failed project. In fact you can re-use the plaster.

Okay here is a quick run down of what i am talking about.

Gypsum, plaster of Paris, sculpting or molding plaster: It's all the same thing, well technically anyway. Gypsum is a form of calcium formed by sea shells buried millions of years ago crushed under countless tones of bedrock and top soil. The calcium of the gypsum whilst it feels dry to the touch is in fact a little wet. The water is trapped in a crystalline form within the gypsum. In this state it still has many uses. Plaster boards, fertiliser etc are two of the most well known forms of use in its unchanged state. Gypsum is sometimes called plaster of Paris because that's where it was first mined, refined and used. Today plaster of Paris or sculpting/modeling plaster is the more accepted name for refined gypsum.

Gypsum comes in a grey colour its natural state. When refined which simply involves heating the gypsum the little water that is held in the crystals is vapourised, effectively bleaching the gypsum giving it both it's white appearance and much stronger form which we call plaster of Paris etc..

When you add water to normal gypsum the crystals swell as they absorb some of the water. As they dry out again they both retain some water and bond in they're now position after swelling. Because they don't absorb much more water than they already hold they don't bond together totally leaving micro gaps between the crystals. Whilst this is still a relatively strong form it's far from good enough for quality sculptures etc. However because plaster of Paris is much drier it then absorbs more water and then swells much more bonding the crystals more tightly. Thus creating a much stronger harder smoother more ceramic like finish that we know.

Now gypsum is one of those weird substances we rarely think twice about in daily life. It is one of those elements around us that can be altered whilst used in some fashion yet it can be converted back to its natural state too.

So with that in mind here is how you can re-use your broken or faulty plaster creations. Lets assume you cast some plaster form(s) in one of the many available mold mediums. Either the details hadn't shown up clearly, there were air bubbles making the creation is weak or malformed or the creation broke during demolding etc. Essentially the cast form is no good for end use so you scrap it. Normally most people would simply bin the creation and start over. This can be a costly waste of materials.

Simply allow the creation to dry out. Either place it in a tough cloth bag burlap etc then break it down to one centimeter sized fragments. Further reduce those fragments to dust as you can either with a blender or better still a coffee grinder. Not having a coffee grinder i simply used my three speed blender. I had to run it through twice in small amounts but the blender coped pretty well. The results can be seen with the grater i used blade below.


Now because this pile of plaster contains tissue paper pulp that i want to keep as it is i will not be carrying out the next stage as it will burn away the tissue paper . I will simply add some new fresh plaster to this in small portions and re-use it in this form.

TO SALVAGE PURE PLASTER CARRY ON WITH THE FOLLOWING
After breaking down and grinding down your recovered 'pure' plaster bake it either in a conventional oven or microwave. Use the largest tray or container you have to save time. Remember however you don't want to make huge mounds for each baking session. As much as you can get on/in the containers as possible without heaping it up works best.

CONVENTIONAL OVEN METHOD:

1: Pre-heat the oven to 220*c
2: Place the tray of recovered PURE plaster (no paint, sealer, varnish etc) in the middle of the oven for one hour. Fan assisted ovens are better as they constantly rotate the heat during baking times and then afterwards dispel the heat when cooling speeding up the process for you.

3: allow to cool thoroughly before handling.

4: bag or box it up in an air tight fashion. Use as normal when ready.


MICROWAVE OVEN METHOD:

1: Use a 600w microwave oven set at its highest power setting.

2: Place the tray/container etc of recovered PURE plaster (no paint, sealer, varnish etc) in the microwave oven for ten minutes.

3: allow to cool thoroughly before handling.

4: bag or box it up in an air tight fashion. Use as normal when ready.

You can repeat this process as many times as you like.

MY PLASTER PULP EXPERIMENTS CONTINUED - A NEW VERSION IS A FAILURE!

First of all i am going to break this away from my 'something for my Etsy store' feature postings and run it from where my last plaster pulp experiment posts left off.


Secondly the title is not quite accurate. The 'new' plaster pulp recipe whilst not being a total success that i was hoping for didn't throw up any new problems. Well beyond human error, okay stupidity. I am not afraid to admit to making mistakes after all. To clarify the mistakes i did not measure of the ingredients for the last two new pulp batches accurately. I simply 'spooned' and guessed the quantities involved. Stupid stupid armature way of doing things i know, i know but there you have it. Moving on then.

My first plaster pulp experiments using ClayCrete a commercially purchased ready prepared mixed pulp were a total success. I forget how much amount wise you get per bag a couple of pounds or so at £10.00 GBP, Not a lot if your making large or numerous projects. However not knowing what the binding agent is in the commercially purchased product leaves me stuck in re-creating the same results it gives with home made recipes - for now at least.

My home made pulps for use in my other earlier plaster pulp experiments were a success also in that they formed perfectly in the moulds copying the details of the moulds & were near enough strength wise to both suit my needs and being close enough to the commercial pulp. How ever as i have said the 'core' of the casts i made using my home made pulps were not bonding with the plaster enough to make them viable.

My new plaster pulp recipe has the exact same flaws, though my armature method of mixing this plaster pulp version if nothing else not only confirmed my previous theories but also reinforced them. I want the mix to be as close to 50% plaster and 50% paper pulp as possible keeping it in the acceptable standard PM constraints and allowing it to be rightfully classified as a paper mache product. So my theories, discoveries and conclusions so far then.

WHITE MATTER Ver. 1 ©TM J Jones
POSITIVE POINTS (Air and radiator drying)
Created using commercial ready made pulp: 100% success. extremely Light weight, strong throughout, fast drying. Can be carved/sculpted using sharp tools.

NEGATIVE POINTS
The commercially purchased ready made pulp IS expensive and comes in small amounts.

GREY MATTER Ver. 1 ©TM J Jones
POSITIVE POINTS (Air and radiator drying)
Created using home made news paper based pulp 70% success, extremely light weight.

NEGATIVE POINTS
Soft inner core: Plaster and pulp not bonding leaving it susceptible to breaking easily.

GREY MATTER Ver. 2 ©TM J Jones
POSITIVE POINTS (air and radiator drying)
Created using home made news paper based pulp 50% success, extremely light weight, strong outer shell finish, fast drying. Can be carved/sculpted using sharp tools if some what cautiously.

NEGATIVE POINTS
Soft inner core: Plaster and pulp not bonding leaving it susceptible to breaking much more easily.

GREY MATTER Ver. 3 ©TM J Jones
POSITIVE POINTS (Air and radiator drying)
Created using home made news paper based pulp 40%/50% success, extremely light weight, strong outer shell finish, fast drying. Can be carved/sculpted using sharp tools if somewhat cautiously.

NEGATIVE POINTS
Soft inner core. Plaster and pulp not bonding leaving it susceptible to breaking much more easily again.

WHITE MATTER Ver. 2 ©TM J Jones
POSITIVE POINTS (Air drying)
Created using home made toilet roll tissue paper based pulp 20%/30% success. If plaster 70% to pulp 30% ratio. Extremely light weight, moderately strong outer shell finish, fast drying depending on water content. Can be carved/sculpted using sharp tools with care.

NEGATIVE POINTS (Radiator drying)
Too much water: Can take 48+ hours to air dry. Extremely difficult to work with even in a mould. Soft throughout surface to inner core with a soft outer paper like pulp like shell. Plaster and pulp not bonding, Shrinkage EXTREME. Cracking and crumbling when handled.

Too much pulp: Dries too slowly, Soft throughout surface to inner core with a soft outer paper like pulp like shell. Plaster and pulp not bonding. Shrinkage EXTREME. Crumbles when handling.

Too much plaster: Dries too quickly, medium hard surface and core. Plaster and pulp slightly better bonding. Shrinkage varies. Crumbles when handling though slightly less so.

THEORIES AND CONCLUSIONS

With exception to the water, pulp and plaster ratios the 'same' main problems as in the original home made pulp versions. The plaster and pulp not bonding sufficiently enough. Adding raw linseed oil contrary to positive research had NO noticeable effect in ANY positive way. Indeed giving pre-made plaster moulds two coats did not strengthen the already hard dried plaster. In fact they became softer. Before painting on two coats of linseed oil the plaster moulds had an extremely hard ceramic like surface that i could not mark with my fingernail and have to when required carve/sculpt with a craft knife. After coating in linseed oil and leaving twenty four hours to dry out i could easily scratch the surface and a little deeper with my thumb nail.

Using toilet roll tissue instead of news paper pulp did make mixing the 'wet' pulp and plaster much easier, so a positive point there. However my original recipes are based on 'dried' pulp ratios. The wet tissue pulp offers up it's own problems in calculating the weight to content ratios for a more accurate recipe since water content of the tissue pulp can and will alter from batch to batch. Something to ponder there for sure.

Substituting the original news paper pulp for the tissue pulp HAS positive advantages i am in no doubt. Certainly in mixing and dry weight, probably even in account of strength too. The problem remains constant however when it comes to achieving a bond in the core of the mix when dry. I have a 'potential' solution in mind, but this brings with it its own potential problems too.

PVA glue (Elmer’s etc) or more specifically the type/brand i use is well known for its bonding properties. Indeed its used widely in the building trade when plastering old dry walls where old traditional lime based plaster would have once been. A coat of watered down PVA glue directly on the wall allows the new modern plaster to bond to the old stone work. So theoretically it 'may' make the plaster bond to the paper pulp in this case?

The potential problems then being PVA glue(s) and liquid latex moulding solutions have one key ingredient 'latex'. It has to be assumed of course that it may vary in amounts andstrengths in each product i know from experience that a torn latex mould can be repaired if torn etc with pure PVA glue, ie: They bond readily and strongly!. So now the question is how much is going to be enough to create a 'potential' bond between the plaster and the tissue pulp without being too much and bonding with the latex mould?

Another thing to consider here of course is joint compounds. Of which there are many versions and again like the linseed oil joint compounds have received a lot of positive press. Of course there remains a singular issue throughout the whole of this experiment that cannot be ignored. We all be we in different counties or countries have different grades of papers, glues and compounds be they joint, latex or wood based. What work for one person in one region may not work for another elsewhere?

At the very least i can hope for is gaining the right working recipe that suits my needs that other 'may' be able to use too or at best if not a working recipe for others then a starting point that they can use to find the solution for themselves in this area at least. Below you can see my most recent attempts and failures.

Here the problem was not enough plaster in the mix.


The experimenting continues.

More soon.

Tuesday, 8 February 2011

SOMETHING FOR MY ETSY STORE - YET ANOTHER UPDATE

Well i finally got around to working on that new plaster pulp mix today that i mentioned in my earlier post. I will have to be careful here i might get a liking for being punctual & frequent whats this for today post three lol. I actually started working on this new mix yesterday but today was the mix i wanted to make properly. Hmm!, better explain this a little better i think.

After some discussion(s) as mentioned in a previous post a suggestion by Jonni Good 'for' using linseed oil & some research of my own i purchased some online a few days back, two 500ml bottles to be exact. I didn't buy it for the extra hardening properties alone however, no. The outer hardness of my own plaster pulp experimental mixes was not the issue i was having. It was the bonding of the heavier paper pulp i was using to the plaster in my plaster pulp mix. I am hoping the softer thinner toilet roll tissue pulp i have now used will absorb some of the linseed oil & then harden with it being there. Then hopefully it might bond to the plaster a little better in the 'core' of the mix. The linseed oil only arrived today however. Yesterday i thought I'd mix up a batch (many small batches as per requirements during use to be precise) as a comparison to today's mix containing linseed oil.

The new batch is a slight variation on Jonni Goods variation of one of my original plaster pulp experimental mixes. This could get very confusing i think if i am not careful lol. Anyway i am using raw linseed oil unboiled. In my original mixes i carefully measured out specific amounts of all the ingredients. The original mixes were larger batches of what i made today of around 4 ounces. This time however i am working to smaller molds so i have been making them at around 1 ounce or so batches measuring the ingredients by the 'spoonful' basically. My current experimental plaster pulp goes as follows:

1: 4/5 desert spoons (depending on mold size) of very wet toilet tissue pulp (as from the blender very water logged wet).

2: 1 cap full of raw linseed oil unboiled mixed directly into the wet tissue pulp.

3: additional water as required just prior to adding the plaster.

4: approx 1 to 1 & a 1/2 ounces of sculpting grade plaster mixed together to form a runny porridge like paste.

5: This i then mixed until it began to thicken (go off) at this point i split the mix between two or four molds depending on the size of the molds in use at the time using a small flat bristled paint brush to apply in the molds. I have not used any supportive mesh cloth at this point. Primarily as i simply don't have any to hand. Its not something i can't seem to find easily locally.

6: If required some molds were 'patched up' were the mix had slid from the rim or edges of some of the molds because of having to work quickly.

7: The molds were then left to air dry for the next couple of days.

EARLY SUMMERISATION
At this point i am 50/50 both hopeful & sceptical that this particular mix is yet right. Some of the mini batches dried hard to the touch minutes after going into the molds even if i applied the mix when still very runny. Some remained very wet more than 2 hours later. I feel this was simply due to sometimes each spoonful of tissue pulp came with more water on the spoon than others. Also sometimes a little more plaster than other times went into the mix. I think i might have to drain the tissue pulp next time & measure both it & the plaster a little more accurately for a more consistent & better working mix to prevent these dry & wet irregularities in the same mix. Not the best scientific method of experimenting using the rule of the thumb, but then it has been a bit of a crazy day for me.

I don't know why at this point but my original working times 'after' mixing has been radically reduced from 8/15 minutes to worst case scenario literally 1/2 minutes after mixing. Could be the change from heavier paper to tissue paper, or the slight irregularity in the plaster amounts i am adding. Hmm!, more than likely the latter i think.

So to draw this post to an end for now. I have made a host of castings up: mini skull trophy/candle sconces, new slightly bigger realistic skulls to the first casts of my ouroboros project. I will let you all know how these batches went once they are all fully dried & de-molded in a few days.

More soon.

SPEAKING OF SUPPORT SHELLS

Whilst making the second plaster support shell for the ouroboros project i found i had a little plaster left over. Again whilst i have already made some mini skulls for my mini trophy/sconce projects i also needed some slightly bigger skulls too. The larger skulls i have since made & copied in latex. These were the 'other' projects i wanted the rest of my current supply of liquid latex for. So as i was saying whilst making the second half of the ouroboros support shell it turned out i had just enough plaster left over to try out one of my new skull molds.

I actually have three designs made up & copied in latex. After casting one of them which i will show you in a minute i decided to sculpt the design a little more enhancing the detail & well you can see the final design below of the first new larger skulls.


As you can see just as with the smaller trophy skulls i sculpted out the lower jaw at the side. I also sculpted out the eye sockets & nasal cavity too on this larger version. I even added the hole in the lower sides of the skull for the ear connections through the skull to the brain as well. Below you can see the actual size of this skull compared to my hand. Whilst the smaller trophy skulls fit 'in' my hand. These larger versions are roughly the size of my closed fist. Oh the strange symbol on the sides of the skulls head are simply pen markings that have leeched into the wet plaster from the latex molds. This is just an identifying mark so i know at a glance which two mold & halves go together when making mass molds nothing more. This will be lost in the painting etc later.


P.S. You can also see in this shot my 'boo boo' has healed to what resembles a crude birth mark now. Other than being totally annoying to look at it is totally healed now.

Whilst taking these pictures i had not noticed a very weird phenomenon, a simple trick of the light of course. By sheer fluke the angle of the light shining through the sculpted holes in the sides of the skull formed a, well before i say anything more can you see it before i say it 'inside' the skull?


Do you see it? A wailing cartoon ghost!. Two eye's peering out of a peeked hooded head? An open wailing mouth complete with tongue & even three fingers on the right hand (as you look at the picture) that complete this weird trick of the light. Spooky or what lol?

Okay back to more serious things.

In previous posts i mentioned my lack of enthusiasm for using anything other than as close to original paper mache materials & methods in my final creations. Whilst discussing various aspects relating to PM on other blogs, groups etc. The use of linseed oil came up many times. Immediately stated there as well as here my lack of enthusiasm for its use. Of course linseed oil has many uses many most people will be well aware of. Somme of the more common being a natural wood preservative it is used to preserve furniture, flooring, cricket bats & is also used amongst other things in glaziers putty too.

So i decided to do some research of my own into its uses in the paper mache world. Amongst my findings & after a helpful pointer from fellow PM artist Jonni Good I found a wealth of information which included the fact that the Victorians used PM in the creation of many of they're wall & ceiling decals & moldings.

Of course it goes without saying that paper is made from wood, linseed oil being a natural plant extract preserves wood. Saying that it stands to reason that many long time PM artists contest that it makes paper mache stronger & last longer. It also turns out that it has unusual properties when mixed with plaster too. For some reason i have not yet discovered beyond my own conclusions as it is a natural 'oil' it then dries out slowly whilst forming a fine barrier around the plaster as they both dry out then this slows down the plaster going off (drying out). This means of course whilst using plaster in molds you gain slightly more working time. It appears too however that either whilst mixing in the plaster during the er!, mixing stage or painting directly onto the dried plaster forms it also hardens the plaster even further than plaster alone, even high quality sculpting plaster which is a more refined gypsum plaster.

I have never been a one to deny when i am wrong on a subject & i have always been a keen advocate in saying "You can't knock something unless 'you' have tried it first". So!, on the findings from my own research online, testimonials from artists, linseed oil manufacturers etc I have decided to try linseed oil both on & in my current & future plaster mold forms as well as my 'new' plaster pulp recipe. I have already given my existing 'new' skull plaster molds two coats as well as the new skull shown above. Below is the new skull with the linseed oil freshly painted on.


Whatever else this may achieve it gives the plaster (in this case) a wonderful aged bone tone which if it stays this colour it will reduce a lot of painting that would be required later.

Prior to painting on the linseed oil i placed a small lit candle inside the skull to see how it would look if i made some up in this way. Below you can see the spooky cool look the candle gave it.


Okay i will leave this post here for now. I am going to go make up some more plaster skulls, plaster & pulp skulls as well as the first of my plaster pulp ouroboros. When i get some of the other plaster skull designs made & enhance them with a little fancy sculpting as i have with this one i will show you the results as well as show you how i am going to re-copy 'new' latex molds from this what is normally an impossible form to make a mold from, or so you'd thing lol.

More soon.

SOMETHNG FOR MY ETSY STORE - DEMOLDING, DEMOLDING

Okay time to de-mold the support shell & the actual latex molds. Below you can see the support shell removed. I have not yet cleaned up the second half of the support shell (in the bottom of picture) but that's just cosmetics in the end i can do that anytime.


If you remember from previous posts in this feature i mentioned i wanted to use less liquid latex molding solution so i had some for other projects? This is then why i needed to make this support shell, for the thinner than it should have been finished latex mold.

Below You can see the latex mold after removal from the master ouroboros project.


As you can see some of the colouring in the plasticine has leeched into the latex mold. This is the first time i have encountered this phenomenon before but it will have no effect on the actual plaster & plaster & pulp castings i am going to make. At worst 'some' of this discolouring 'may' be transferred to the actual copies. In the end though the colours i have chosen to make the final copies will bury this colouration easily. Below is a close up of those scales i spent so much time making. Sorry about the picture quality i found standing long enough to take the pictures at this point a little tiring having decided at the last minute to take this shot after i took all the others.


You can probably see them better in the smaller picture above this one? As you can see they turned out just about perfect. As to the original master copy of the ouroboros, well that didn't fair so good as you can see below.


As you can see many of the scales peeled away from the master form, but they also peeled right out of the latex mold halves too so this was not an issue in the end. Plasticine reacts oddly to liquid latex in that it dries out slightly. The good news is of course it does not stick to the liquid latex either. I have found once you re-work the 'used' plasticine such as this back into another quantity of fresh plasticine it seems to return to its original more malleable form again so can be re-used several times in mold making such as i have shown you.

Now the next stage is to mix up some plaster pulp & create the final designs to attach to the mirrors i have. I am still working on the perfect recipe for my plaster pulp at this time but have a 'new' recipe in mind & will be trying it out later today. Early tests seem positive i just need to get the pulp to plaster ratios a little closer to the final desired mark.

More soon.

Monday, 31 January 2011

SOMETHING FOR MY ETSY STORE - ANOTHER UPDATE

Whilst checking my shell for my latex mold on my ouroboros whilst it was drying it occurred to me i may have been a little over ambitious with the plaster, making it a little too heavy to handle. As i have six nineteen inch mirrors to work with so far & plan to purchase another six (if they are available in store) on tomorrows monthly art supply run. It is going to be handled quite a lot!. Because of part of my disabilities (week left arm due to shoulder damage) i run a higher risk of dropping it!.

As i am using a high grade sculpting plaster not basic gypsum plaster it will dry to a near ceramic hard finish & will be difficult if not time consuming to alter. So whilst the plaster was still semi-wet i decided to reduce the amount of plaster shell around the latex mold. Whilst this IS a risky thing to do with soft plaster it can be achieved if care is taken, & a sharp craft knife of course. Below is the 'new' design for the plaster outer shell.


Not perfectly round but then this is just a support for the latex mold in the end. What you are looking at here is what 'was' the back side of the support shell, which now becomes the front, or new working surface. Whilst i do not need to add any releasing agent to the latex when using plaster i will need to do so to the visible plaster surface before i can add new boxing & pour the next half of the outer support shell. As always i will be using bees wax as a releasing agent.

Normally you should wait until the first section of the plaster mold was fully dried before creating the second half. As i want 'both' halves to dry as close as possible however i am going to carry on creating this outer support shell now.


With the exception of the 'hole' in the middle i created the boxing around the first outer support shell just as before using pizza card stock & masking tape. Once again i have since poured the plaster into the boxing mold after this picture was taken. I will show the separation & demolding of the plasticine covered paper mache ouroboros in the next post.

For all this is very tough plaster when fully dried it IS after all plaster & subject to damage relatively easily especially now since i reduce the size & strength factor of the shell radically. I have had on occasion  plaster molds become damaged, my fault these times not hapless family members for a change. Ordinarily so that they were unusable. However with some brief experimentation i have found that should a plaster mold be damaged in one such case split in two complete halves. You can glue the two halves together using undiluted PVA glue (Elmer's etc) the layer the reverse (back) of the plaster mold with four to six layers of telephone directory pages torn into manageable strips. If need be a small amount of plaster can be mixed up to fill in the cracks or gaps in the working surface of the repaired mold too. Or even ready made poly filler which is a paste like plaster filler if you don't want to mess with mixing small amounts of plaster for the repair(s).

I tried this using news paper but it becomes too hard & brittle. For some reason telephone directory paper & PVA glue dries to a very tough skin that is much harder to split as with new paper.

More soon.

Sunday, 30 January 2011

SOMETHING FOR MY ESTY STORE - PART 4

So now i have the liquid latex mold on the ouroboros six layers in all. Liquid latex varies from manufacturer to manufacturer & also can have special colours added to them during the mixing process of course. The type i am using is a simple low cost run of the mill none branded type without any added colours. The best way to judge when 'enough' is 'enough' when creating such a mold such as with this liquid molding latex when using for the first time is very simple. The first four coats (brushed on) will be virtually totally transparent. As you add further layers the colour will deepen to an off yellow. I always add a small amount of latex thickener too of course so the final colour may vary if the thickener is not used. Around eight to ten layers is more than sufficient for most molded forms but by then the latex will have taken on a more 'solid' off yellow look to it. Of course when using 'any' liquid molding mediums trial & error will be required from form to form. What i have written here 'must' only be taken as a 'rough' guide when using such mediums yourself.

Below is my ouroboros inside the six layers of liquid latex which has had several days to dry thoroughly. Always allow twenty four to thirty six hours drying time especially when building up thick layers or when brushing into eye cavities etc where the liquid latex is going to be much thicker than the rest of the mold your creating. Once the outer layers are touch dry the inner layers need more time to dry thoroughly as they are trapped underneath. Again a little bit of trial & error is involved here for the first time users.


Don't worry too much about what look like clotted areas, lumps or bumps as can be seen on 'my' mold above. These are both superficial & on the outside anyway. These will not be reflected inside the mold nor will they effect the copy your making in anyway shape or form. They just look very unprofessional, but then who's going to see it in the end?


Here you can see where i have marked where i will be cutting the actual mold open later. If you use enough latex to make a 'self supporting' mold then ignore the next stages i am about to show you. I only buy this in small amounts of one litre bottles along with a small one hundred millilitre bottle of thickener solution. I marked mine 'now' to show you the best way to cut open 'your' molds if you attempt this.

Now as i have said i am using less than the optimum amount of latex to form my mold here (I wanted some for other projects) so now i need to make a support for this mold. For this i am going to create a plaster shell around this 'un-cut' mold. I will make the plaster shell in two halves as if i were making a mold of the mold so to speak. This way the plaster support shell can be removed & the latex mold can be released allowing the de-molding of the subject inside as normal for a latex mold. Below is the card stock frame or boxing i created to hold & shape my plaster.


Ah pizza card stock i can't state just how versatile this stuff is lol. Here you can see i created a 'solid' disc in the center of the ouroboros & a walled ring around the outside too. All this requires to hold it in place at this stage is a little masking tape. Of course any kind of tape will suffice even glue but tape will allow me to remove the boxing much cleaner later.

Here it is on the reverse or back side view.


As you can see the boxing only comes up one half of the latex molded form. Since taking this picture i have filled the first side/half of the boxing with plaster. Once this is fully dry i will remove ALL the boxing shown here then create a new wall around the edge of the first plaster form. I will show this being done in the next posting. You can see this being carried out in an old post 'plaster casting a dolphine' if you can't wait. You can also see the video on YouTube too. My links to my videos can be found by scrolling down the page, they are on the right hand side of the screen as you go near the bottom.

More soon.

Tuesday, 25 January 2011

SOMETHING FOR MY ETSY STORE - UPDATE

My ouroboros project has just gone under the 'last' layers of liquid latex today of which i decided to go with six in all. Now normally this whilst producing a perfect molded copy of all the details will not be sufficient to handle any real casting of any real worth. I created my early plaster pulp mixes with the intention of using the mix in such molds as the ouroboros project of course but i still have something else to do to the latex mold before i can begin to use it efficiently.

As the current mold is too thin to use (intentionally so) i need to give it some more support. To do this i am going to create a plaster 'shell' around the latex for that very purpose. I will show you the latex covered ouroboros soon then with the plaster shell in place. I will include the step by step creation to removal pictures as well of course. My finished ouroboros will come in three forms: A full free standing nineteen inch mirror form, A half body nineteen inch mirror wall hanging form & a full bodied none mirror form which can be hung or just placed as an ornament on a shelf etc

This update however is more intended to mention another special project that i am hoping to have finished 'alongside' my ouroboros project for inclusion in my Etsy store too. I am not going to give too many details away at this stage on this project but i will say that it or rather the three versions of it are going to appeal to those of you with a dark sense of humour. They as the unfinished logo shows below are something you can hang up. In fact they can be hung up virtually anywhere you'd like to display them. In the front of your car windscreen (though they'd suit a large car better), your truck or well anywhere you like.

They will be combined of a light weight mix of my plaster pulp & paper strips in construction & as i said before they like my ouroboros will come in three 'styles' to begin with but i hope to make other versions soon after. To make the creation process possible & allow me to carry on with 'other' projects both for my Etsy store & basic how too's for my blog here etc i have or will be employing one of my elder sons to do the actual casting & painting side of things. He will receive payment on a 'as sold' commission which he is happy with. The work he will do will of course be of a high grade as like myself he is adept at many art skills which include drawing, painting, sculpting as well as many others of his own he has learnt. Whilst they aren't important here they include qualifications in body piercing & tattooing amongst others.

So for now here is a sneak peek at the master logo (which will be displayed & updated as required later) in my right hand column. Which will 'later' have full details of these creations when they are for sale in my Etsy store.


The 'COMING SOON' text will of course be replaced with images of the three finished creations when er!, finished. Whilst the name of these creations IS as shown the 'hoody' part may not be what many might think it is right now, but all of this will become clear when you see them lol.
 
The final stages of the ouroboros project build soon.

Sunday, 23 January 2011

SOMETHING FOR MY ETSY STORE - PART 3

Sorry for the delay in this folks as normal for me (most of us too I suppose) much going on offline. This part of the ouroboros project is more of an update but I can show you what I have done so far as I changed how I was going to do the scales.

I was initially going to use a scale like mesh cloth to ‘imprint’ as scale effect onto the upper body of the snake & the effect worked but for one small detail. It turned out that the scales the cloth imprinted were too small for this size of snake sadly. So I abandoned that plan & came up with a more radical time consuming method. Seeing as I was sculpting the head scales individually I decided the best option in the long run was to carry on sculpting the scales in this fashion. All 1396 of them!.

51 scales on the stomach
104 scales on the head (upper & lower combined)
1241 scales on the upper body

As I say very time consuming & not I might also add not finished in a single day. Cutting individual scales then sculpting them onto the body is hard on tired eyes trust me on this lol. Below you can see the finished result:


To create the scales I used two sizes of plastic straws. I started at the snake’s mouth with the smaller of the scales working back over the body towards the top & back of the snakes head. Below you can see the two sized straws & a few of the scales I created.


The next stage will be to cover the entire project in around 4/6 layers of liquid molding latex. Now normally this would not be near enough for support of the finished mould when dry. Whilst all the details would be copied into the liquid latex when dry, the final mould would simply be too flexible to work with as I want to use one of my plaster pulp mixes to create the final ouroboros to attach to the mirror. In previous liquid latex molds (mini skull trophy project) I added support to the final latex mould by adding a layer of fine cotton mesh material in-between the final layers of latex as I created the final layers. At this time I no longer have any such material at hand so I will instead be creating a pure plaster shell ‘over’ the dried latex mould. More on this in the next post.

The final molded snake will of course be as hollow as I can create it even with using the plaster pulp mix instead of my more traditional & much preferred strips. Also the plaster pulp mix I will be using is of course almost as half as light in weight as it would be if I created it in pure sculpting plaster. I will begin the next stage of this project tomorrow & should have the pictures to show you in the next day or two.