Here are 3 finished masks waiting to be copied in plaster cast molds from which the 'final' wearable mask will be formed. I painted them red so the would stand out on the black background so you could see them a little better. The mask i was working on in part 1 is the mask to the first left of the picture. The mask on the furthest right is the plasticine only constructed mask (the multi-coloured one) also shown in part 1. Remember ALL these masks came from the 'same' single master copy i showed you in part 1.
I am getting ahead of myself & leaving you all in the dark a little here so let me just back track a little to show you HOW i built up the 'new' version using foil then i will come back to adding the finer features using plasticine again later.
Once you have your copied commercial mask such as this one below in paper or in pulp if you prefer that way. The fasted & cheapest way to modify it to make it your own & design & no longer break any copyright laws as i have said is with foil. Take a good look at your copied mask & decide how YOU want it to look.
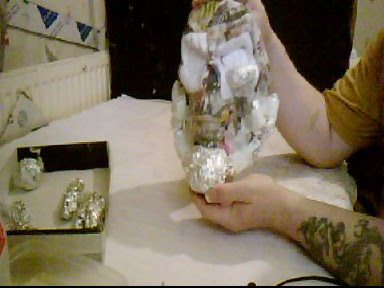
Once you have done that then make up some crude segments for the features your going to change. Remember how ever you want to be able to squeeze the foil & bend it into new shapes. So when you make the facial add on's leave them loose. By that i mean DON'T crush them solid at this stage. Here i have placed all MY additional pieces of foil into a box to keep them together so there is less chance of them being crushed accidently.
Here for instance is my new jaw bone.
If you are not very good at working out the size & shapes of the additional foil sections then simply tape them in place temporarily with masking tape as you make the pieces. That way you can best judge the final look you are going for.
Keep going until you have all your required pieces. Here i have added the section of the jaw where it would join to the sides of the skull. It's the small off set 'V' shaped piece.
Then the cheek bones.
For the eye ridges above the eye's on this design i decided to go with foil balls. Once mask version when i paper strip over these they will make great upper eye ridges. Experiment with ALL your new features. The more enlarged or prominant they are the more skeleton/demon like they will be in the final mask design which is what we are going for here after all.
Now this version is almost ready for the next stage adding the paper strips. Notice i haven't made any chages to the mouth/teeth area yet. This i am going to do entirely with plasticine once the paper strip layer is dry. I just need to add one more detail to this version.
The nose ridges. For this i have cut two small sections of pizza box card stock. Again as with the other facial features try different shapes & sizes.
I never make the nose feature too large though. I like to keep these so they come no further forward than the upper eye ridges as you can see here.
Full length, short, deep, shallow. ALL these things add character to the final designs will alter each mask significantly so again experiment with designs before you commit your design to the paper strip stage. I have often rushed this only to find i liked another way. Then had to cut out sections to start over. So take your time, choose slowly what you want to do.
Okay now MY new mask (this one at least - 1 of 6 in the works) is ready for the paper strips stage. Take your time with yours.
So this mask is now ready to be stripped over. In the next post we will take one final look at building the teeth on these masks. Hopefully 'before' the Christmas break comes around.


No comments:
Post a Comment