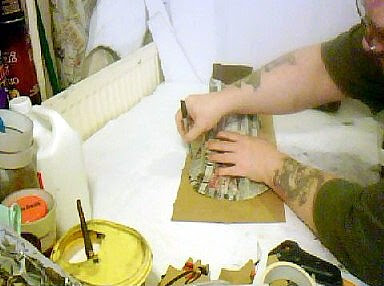
I lined around 1 3rd of the way up the 'inside' of the wave as you can see here with foil. I also used only enough masking tape to keep the foil as close to the shape of the 'inside' of the wave as possible. Have you worked it out yet? Don't worry it will all become very clear in a few minutes lol.
To this new foil layer i than added 4 layers of standard news print strips but left this layer just short of the top of the foil so it remaind 'seperate' from the actual inside of the wave making it removable later.
Over the 4 news print layers i then added 2 100gsm paper strip layers. Sometimes those apparantly useleass heavy 'matt' paper printed flyer magazines that come in news papers actually have a use after all lol.
Over that layer i then added 2 layers of 120gsm grade brown paper. The colour is of no importance here nor is the actual 'finish' of the paper, smooth or rough. It was simply some heavy paper i had laying around at the time & of the grade i wanted to use for the final layer at this stage. Like the previous layers i kept this layer short of the actual wave inside.
Once the 'new' internal 'copy' was fully dried i then pulled it free. Voila' a perfectly matching inner box. Or rather it will be a perfectly matching 'removable cash trap'. Have you worked out WHY i am doing it this way yet then? No keep reading then it WIL become clear lol.
Of course the 'removable cash trap' is useless without a bottom of it's own so let's make that now. Normally i would use a single piece of cardstock here but i didn't have any laying around. Perhaps some rich kind hearted benifactor might order me some large sheets of flat corrigated cardstock online some day lol. Anyway i taped together 2 pieces of pizza cardstock to fit the bottom of the removable cash trap. Masking tape will work fine here as i am going to cover this in news print strips anyway later.
Rather than work with corners that might get in the way i drew around the removable cash trap to cut out a much easier to manage piece of cardstock. Of course if you have plenty of room to work with then this is extra work you can miss out at this stage. As you can see i work in a small corner space lol.
I then at first hot glued this in place.
I then gave the 'inside' of the removable cash trap' 2 layers of news print strips to both tidy it up but to also add to the strength of the bond to the base too. I then gave the 'outside' of the removable cash trap 1 layer of news print strips to tidy it up a little to cover up where the odd piece of foil that could not be removed. I ONLY gave the 'outside' 1 layer as i don't want to alter the near perfect fit it has. Er!, what's that red plastic ball doing in shot? For that matter the small box in the background too? I need a bigger working space lol.
Now because i can't put the removable cash trap back into the wave to dry & retain it's shape i have to leave this in a 'cool' place to fully dry out slowly to reduce warping. So i am going to have to leave this a couple of days to dry out.
So has anyone worked out WHY i made this 'removable cash trap' inside the money bank instead of just making a simple hole with bung? Okay here is the reason. What is the one thing you CAN'T do with ANY standard money bank unless you destroy it to get your savings out? Thats right you can't put 'paper' cash in a money bank without smashing it to remove it first lol. Making this custom money bank with the removable cash trap means my daughter can NOW drop 'paper' money into the money bank & remove it any time she wants without having to smash it to get it back out again. Simple when you think about it really lol. More on this project soon.


No comments:
Post a Comment